Configuring Google Calendar to 2-way sync with a WordPress Plugin
You can get your Google Calendar events with other computer applications, like Outlook and WordPress plugins.
Client ID and Client Secret
Before you can integrate Amelia with Google Calendars, you must create a “Client ID” and “Client Secret”.
- Go to the Google Developers Console.
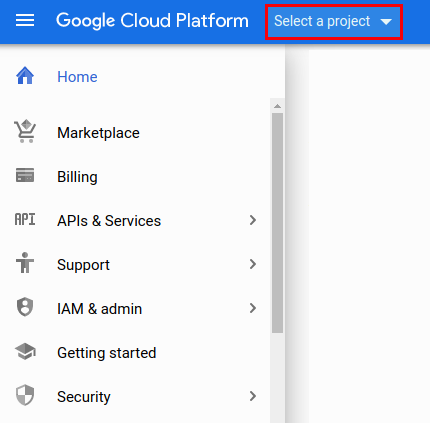
- Click on “Select a project”, or if you have some other projects active, simply click on the drop-down to create a new project.
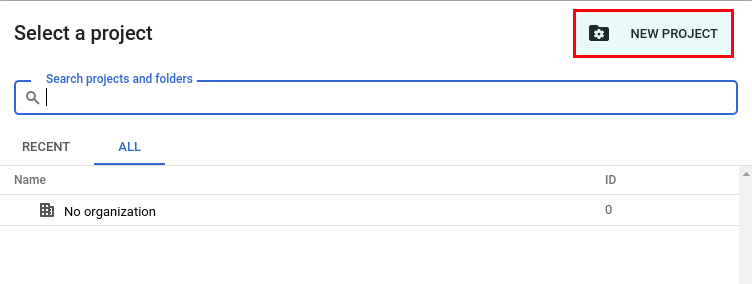
- In a new window that appears, click on “NEW PROJECT” in the top right:
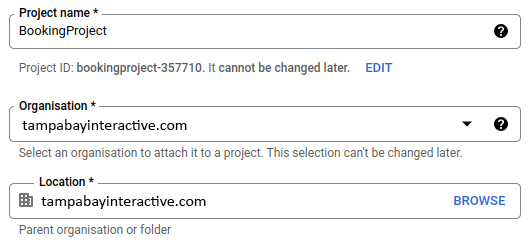
- Enter the project name, select “No organization” and click on “CREATE”:

Please note: If you’re using your business account (G-Suite), you do need to select your organization and the location associated with it. All other steps remain the same.
For example:
- You will see the project is being created in the upper right corner, and when it is created you will see a notification similar to what you can see here:
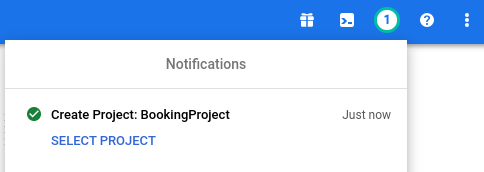
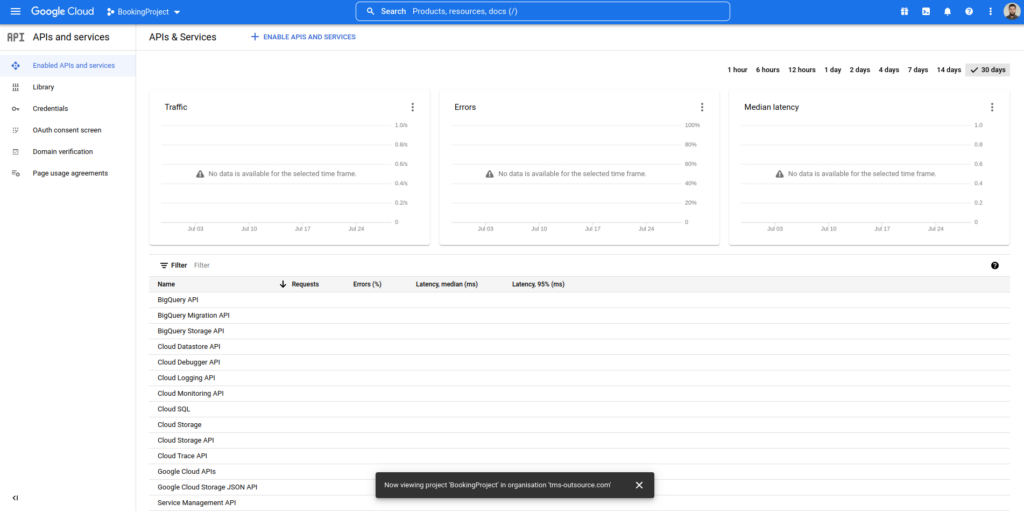
- In that notification, click on “Select Project” and you will be taken to the Project’s dashboard (“Enabled APIs and services”).
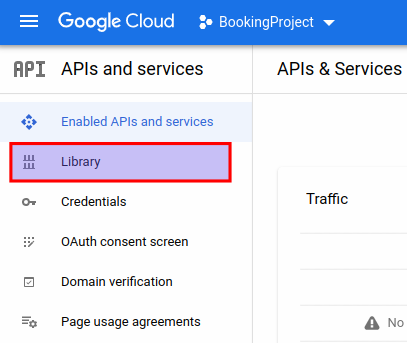
- From the left-hand side menu, select “Library“:
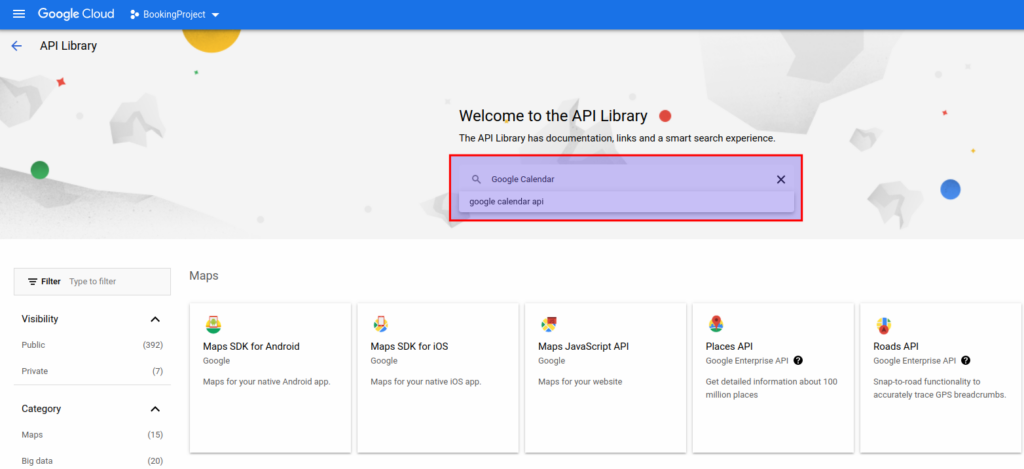
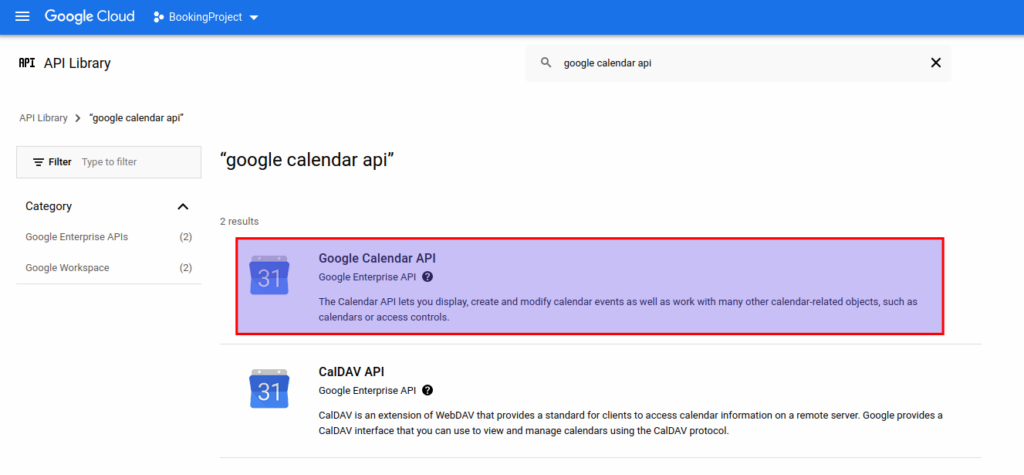
- On the next screen, start typing “Google Calendar”, and the “google calendar api” option will appear:
- If you click on that option, or simply hit ENTER, you will see two results. Click on “Google Calendar API“
- Next, click on the “Enable” button.

- When the API is enabled, you will be taken back to the “Enabled APIs and services” screen. Click on the “Create Credentials“ button in the top right corner.

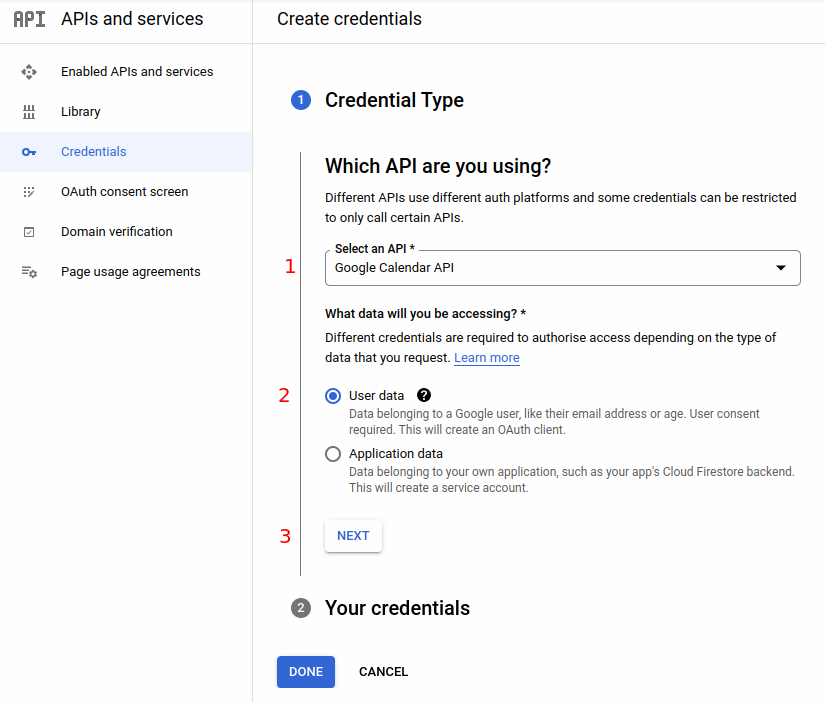
- This will open the “Credentials” window. There you need to select:
- Google Calendar API;
- User data;
- Click on “Next”.
- When you click on “Next”, step 2 will open up, where you need to provide the “Name” of the App; select the email in the “User support mail” dropdown, and provide the email of the App developer (this is usually the same email as the “User support mail”):
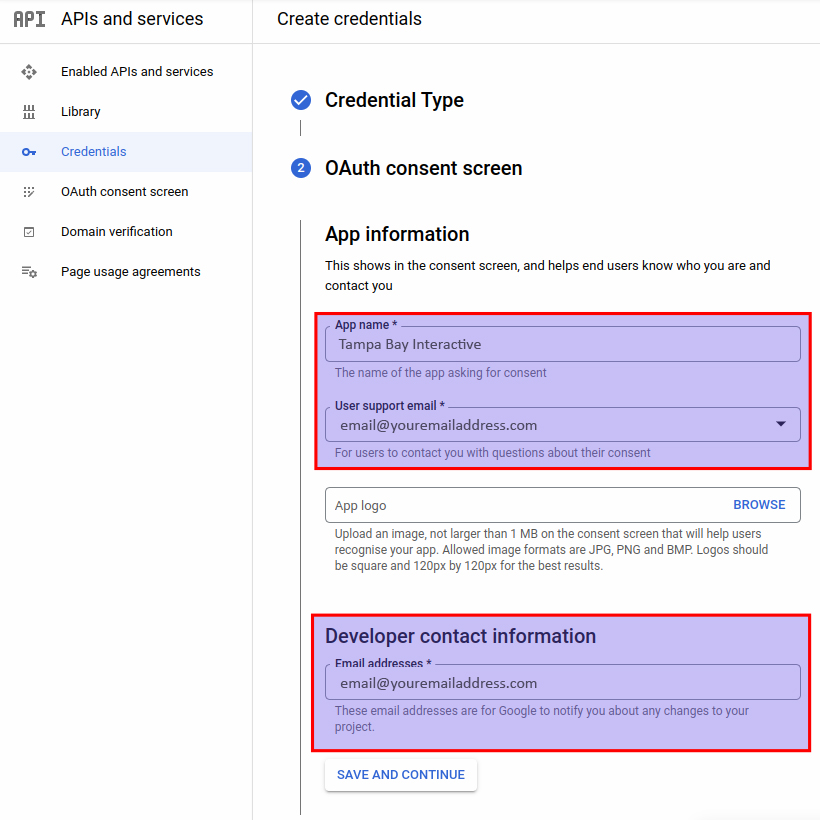
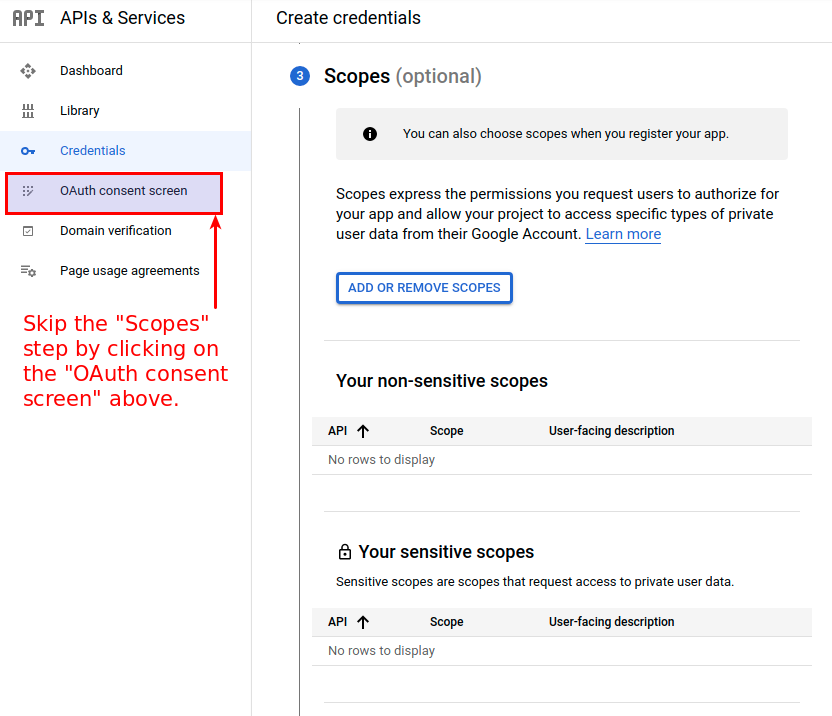
- After you’re done, click on “Save and Continue“, below the “Developer contact information”, and skip the remaining steps by clicking on “OAuth Consent Screen” in the left-hand side menu:
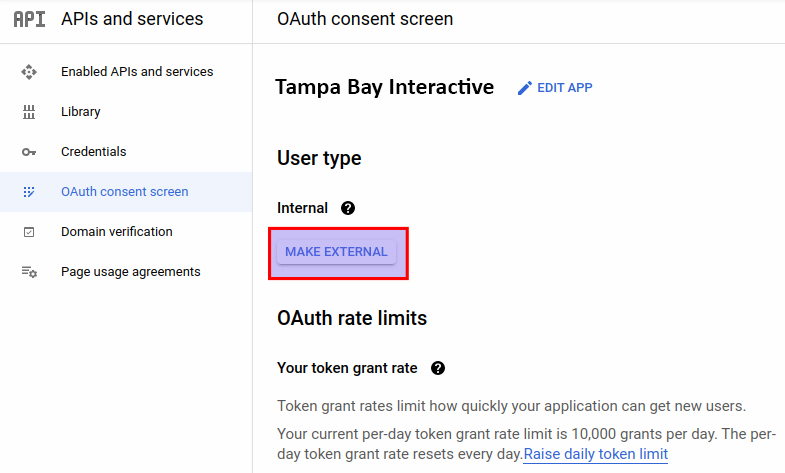
- Here, the “User Type” will be set to Internal, so you need to click on the “Make External” button.
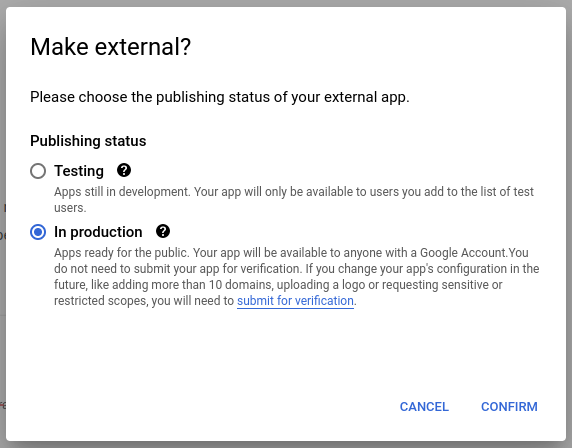
- A new modal will pop up, where you need to select “In production” and click on “Confirm” in the bottom right of the popup:
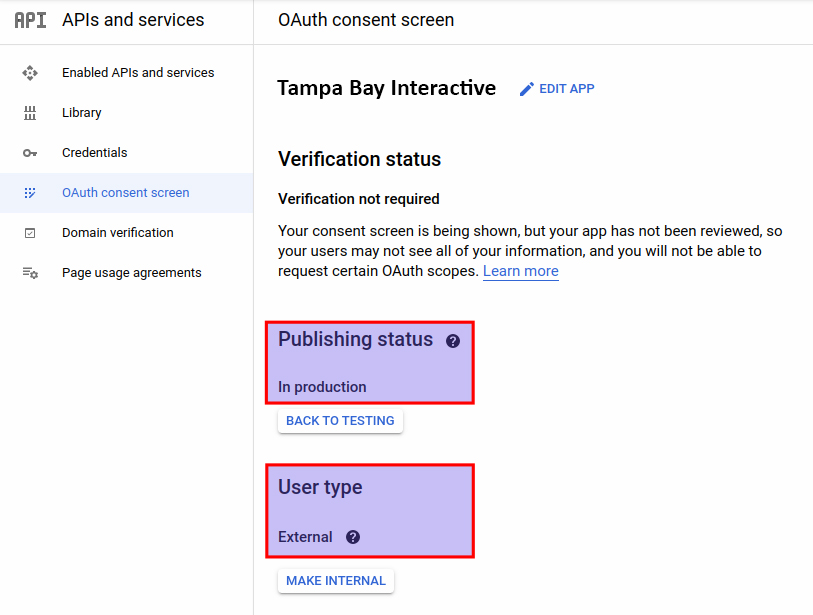
- Before continuing, verify that the OAuth consent screen (the screen that you see when the “In Production” popup closes) shows the app is in production, and that the user type is external:
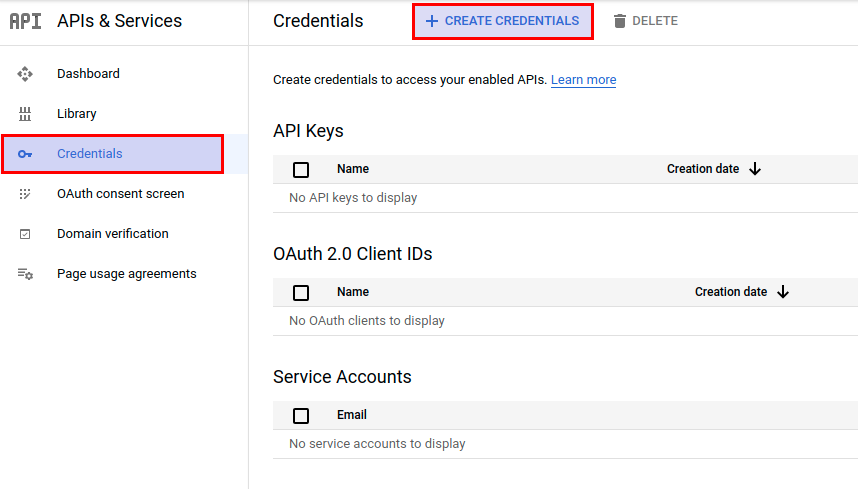
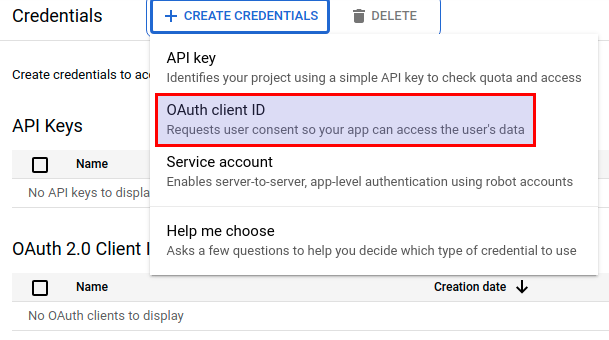
- Now, you can go to “Credentials” in the left-hand side menu, and you will see empty lines for “API Keys”, “OAuth 2.0 Client IDs” and “Service Accounts”.
- On the top, click on “+ Create Credentials“
- This will open a drop-down, where you need to click on “OAuth client ID“:
- Here, from the “Application type”, select “Web application” (1), enter the name of the application (2), and click on “+ Add URI” (3).
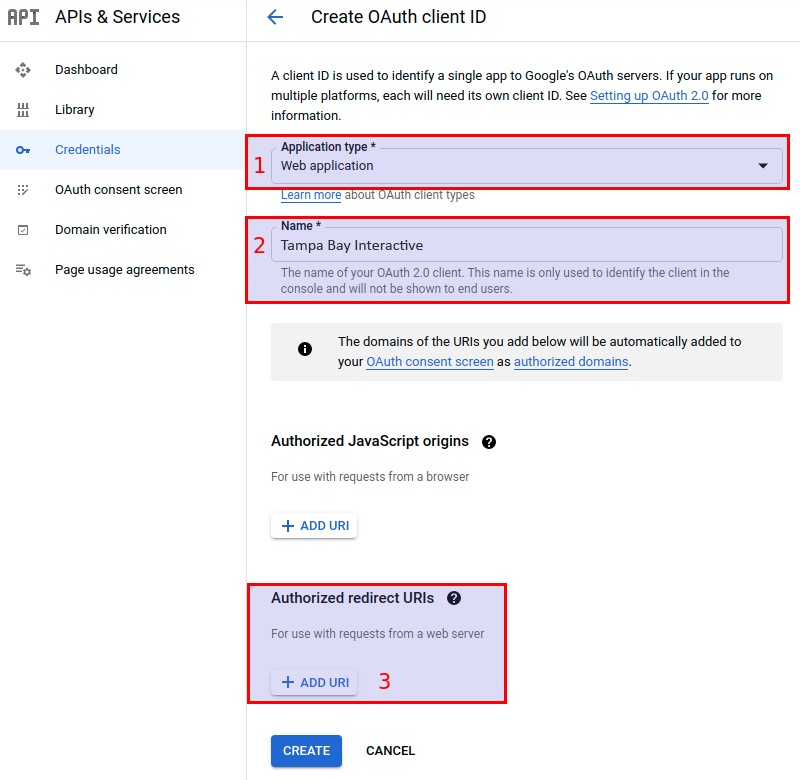
- A field will appear, where you need to paste the redirect URI for Google Calendar/Redirect URI field. After you paste the URI, click on the “Create” button below.
- If you use the front-end Employee panel and want to allow employees to connect their Google calendars from there, you also need to add the full URL of the page where you have the front-end Employee panel, as well. Please make sure to include the whole URL, with the closing ” / ” included, as shown in the screenshot below (“staff-portal” redirect URI).
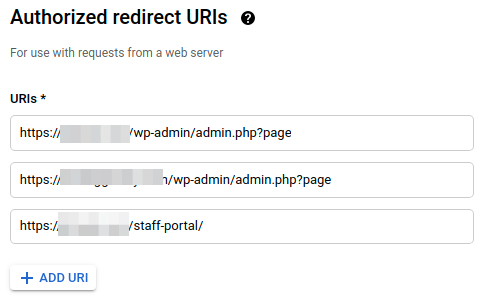
Please note that with the latest update from Google, your website will need to be HTTPS, and adding URIs with HTTP will not work.
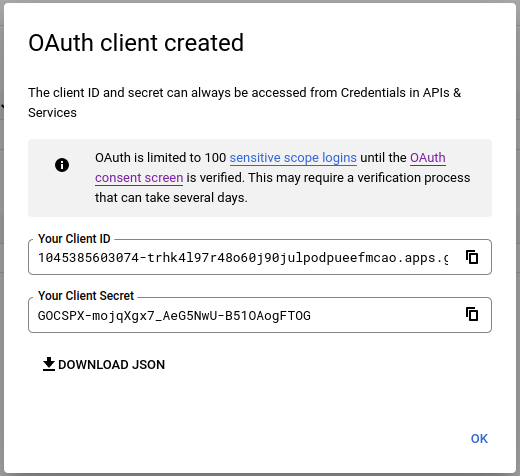
- A new modal will open up, and from there you will need to copy and paste “Your Client ID” and “Your Client Secret” into related fields of your plugin.
Ready for a website that drives traffic and grows your online presence?
Let's talk about creating a beautiful, eye-catching responsive website that drives traffic, educates customers, generates leads, and closes deals. Please tell us a little bit about your business.